DIY Stone Fireplace Makeover
A fireplace is often the centerpiece of a living room, and over time, it can start to look a little outdated. I’ve always believed that with some effort and creativity, you can breathe new life into just about anything, and that’s where a DIY stone fireplace makeover comes in. Whether your fireplace is old brick, tile, or just plain, giving it a fresh stone facade can completely transform the look of your living space. Let me take you through the entire process of a DIY stone fireplace makeover, from choosing the right materials to the final touches that will make your fireplace stand out.

Why Consider a Stone Fireplace Makeover?
When I first thought about updating my fireplace, I knew that the room needed a bold statement, and a stone fireplace felt like the perfect solution. A stone fireplace adds warmth, texture, and a natural feel that other materials simply can’t match. What I love most about stone is its timeless appeal—it instantly elevates the look of the entire room and makes the fireplace a true focal point. Plus, stone comes in so many varieties, giving you the freedom to choose a style that complements your home’s décor.
Another reason I opted for a stone fireplace makeover is durability. Stone not only looks beautiful but also stands up well to wear and tear. Unlike wood or tile, it doesn’t require much upkeep once it’s installed. So, if you’re looking for something low-maintenance that will last for years, stone is an excellent choice.
For me, the DIY aspect was also a big motivator. You don’t need to be a professional to achieve a stunning result. With the right materials and a bit of guidance, a stone fireplace makeover can be done over a weekend or two, transforming your space with a project you can proudly say you did yourself.

Choosing the Right Stone for Your Makeover
Selecting the right stone for your fireplace makeover is arguably the most exciting part of the process. You can go for natural stone, which includes materials like slate, fieldstone, or river rock, or you might consider stone veneers, which give you the look of real stone but are lighter and easier to work with. I’m a big fan of stone veneers. They’re more affordable, come in various styles, and are easier to install because they don’t require heavy-duty structural support.
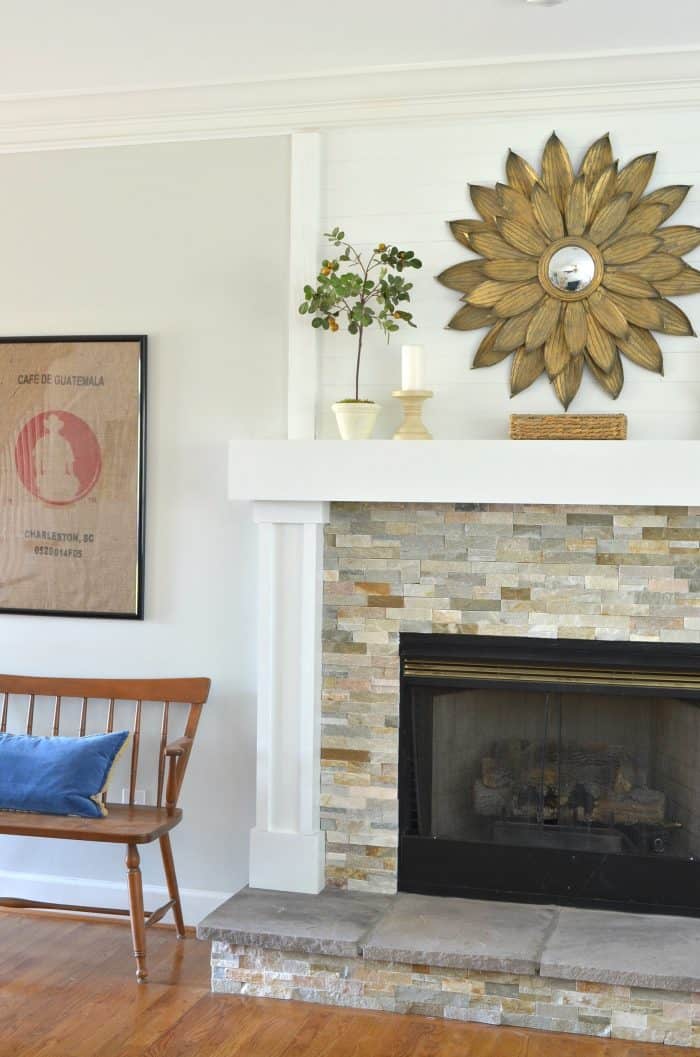
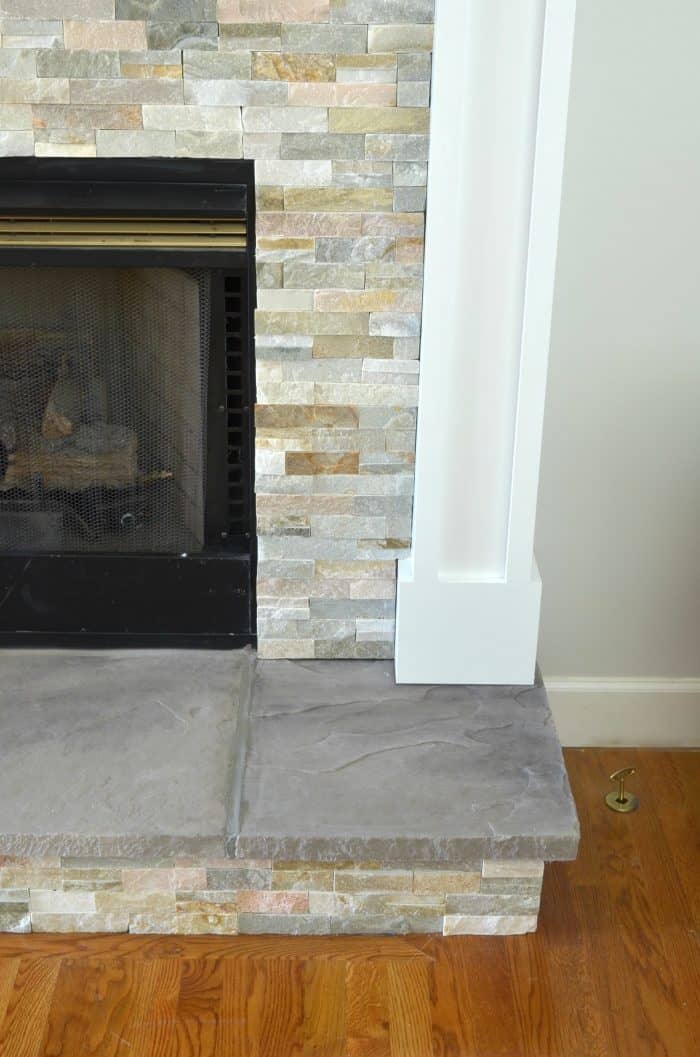
If you want a rustic or natural look, larger stones or rough-cut varieties are perfect. They create a bold and organic appearance that can make the fireplace feel like it’s part of the landscape. On the other hand, if you’re aiming for a more modern and clean look, cut stones or stacked stone veneers offer a sleek, sophisticated aesthetic. When I did my fireplace makeover, I chose a stacked stone veneer in soft gray tones, which added both texture and elegance without overwhelming the space.
Color is another consideration. Neutral tones like beige, gray, or earthy browns are popular because they blend seamlessly with most interior styles. However, don’t be afraid to get creative with your choice of stone color. Darker stones can create a dramatic contrast, while lighter tones can make the fireplace feel airy and bright. The key is to choose a stone that not only fits your style but also complements the other elements in your room.

Preparing the Fireplace for the Makeover
Before you start laying stone, the fireplace must be properly prepped. This was a critical step for me, and I quickly realized that preparation is half the battle in any DIY project. First, you’ll need to clean the surface of the fireplace thoroughly. If it’s covered in soot, dirt, or grime, use a wire brush and some elbow grease to scrub it clean. For me, this part took some time, but it was worth it to ensure the new stone adhered properly.
Once the fireplace is clean, inspect the surface for any cracks or damage that need to be repaired. If there are any significant gaps or crumbling areas, use masonry filler or mortar to patch them up. I didn’t have any major cracks in mine, but even small imperfections can cause problems later, so it’s worth taking the time to make sure everything is smooth and secure.
Finally, if your fireplace is made of a material like tile or smooth brick, you might need to rough up the surface to ensure the stone adheres well. This can be done with sandpaper or a grinder. In some cases, applying a scratch coat (a thin layer of mortar) can help create a better surface for the stone to bond to. Trust me, this prep work is essential—it ensures that the stone won’t shift or fall off later.

Installing the Stone on Your Fireplace
Once your fireplace is prepped and ready, it’s time to start installing the stone. This is the part of the project where your fireplace will start to come to life, and it’s incredibly satisfying to see the transformation take shape. For me, this was both exciting and a bit challenging, but with patience, it’s doable. Start by laying out your stones on the floor before attaching them to the fireplace. This allows you to experiment with different arrangements and ensure that you have a natural-looking pattern.
Begin at the bottom of the fireplace and work your way up. This helps support the weight of the stones as you go, preventing them from sliding out of place. Apply a layer of mortar to the back of each stone (or to the fireplace surface itself, depending on your preference) and press it firmly into place. I found it helpful to use a notched trowel to spread the mortar evenly and ensure a strong bond. Be sure to leave consistent gaps between the stones, which you’ll later fill with grout.
As you continue, check your work frequently to make sure the stones are level and aligned. For me, it was easy to get caught up in the process, but taking a step back every so often to assess the overall look helped me avoid mistakes. If you’re using irregularly shaped stones, you might need to trim some of them to fit the edges or around the firebox. A wet saw or masonry chisel can make this job easier. It’s time-consuming, but the result is a beautifully tailored fireplace.

Grouting and Finishing Touches
Once all the stones are installed, the next step is to grout the spaces between them. Grouting is what really pulls the whole look together and gives your fireplace that finished professional appearance. I opted for a gray-colored grout to blend seamlessly with the stones I used, but you can choose any color that suits your design. A lighter grout will make the stones stand out more, while a darker grout can create a more subtle, unified look.
To apply the grout, use a grout bag, which works much like a piping bag used in baking. Squeeze the grout into the gaps between the stones, then use a trowel or your finger to smooth it out. This was one of the more tedious parts of the process for me, but it’s important to work carefully to avoid smearing grout over the stones themselves. After the grout has been applied, wipe away any excess with a damp sponge. Be sure to clean the stones thoroughly before the grout sets, or you could end up with a haze that’s difficult to remove.
After the grout has dried, the final step is to seal the stone. This will protect the stone and grout from dirt, stains, and moisture, ensuring that your fireplace stays beautiful for years to come. I used a natural stone sealer, which doesn’t change the appearance of the stone but provides a layer of protection. Applying the sealer was quick and easy, and it gave me peace of mind knowing my hard work was safeguarded.

Admiring the Transformation
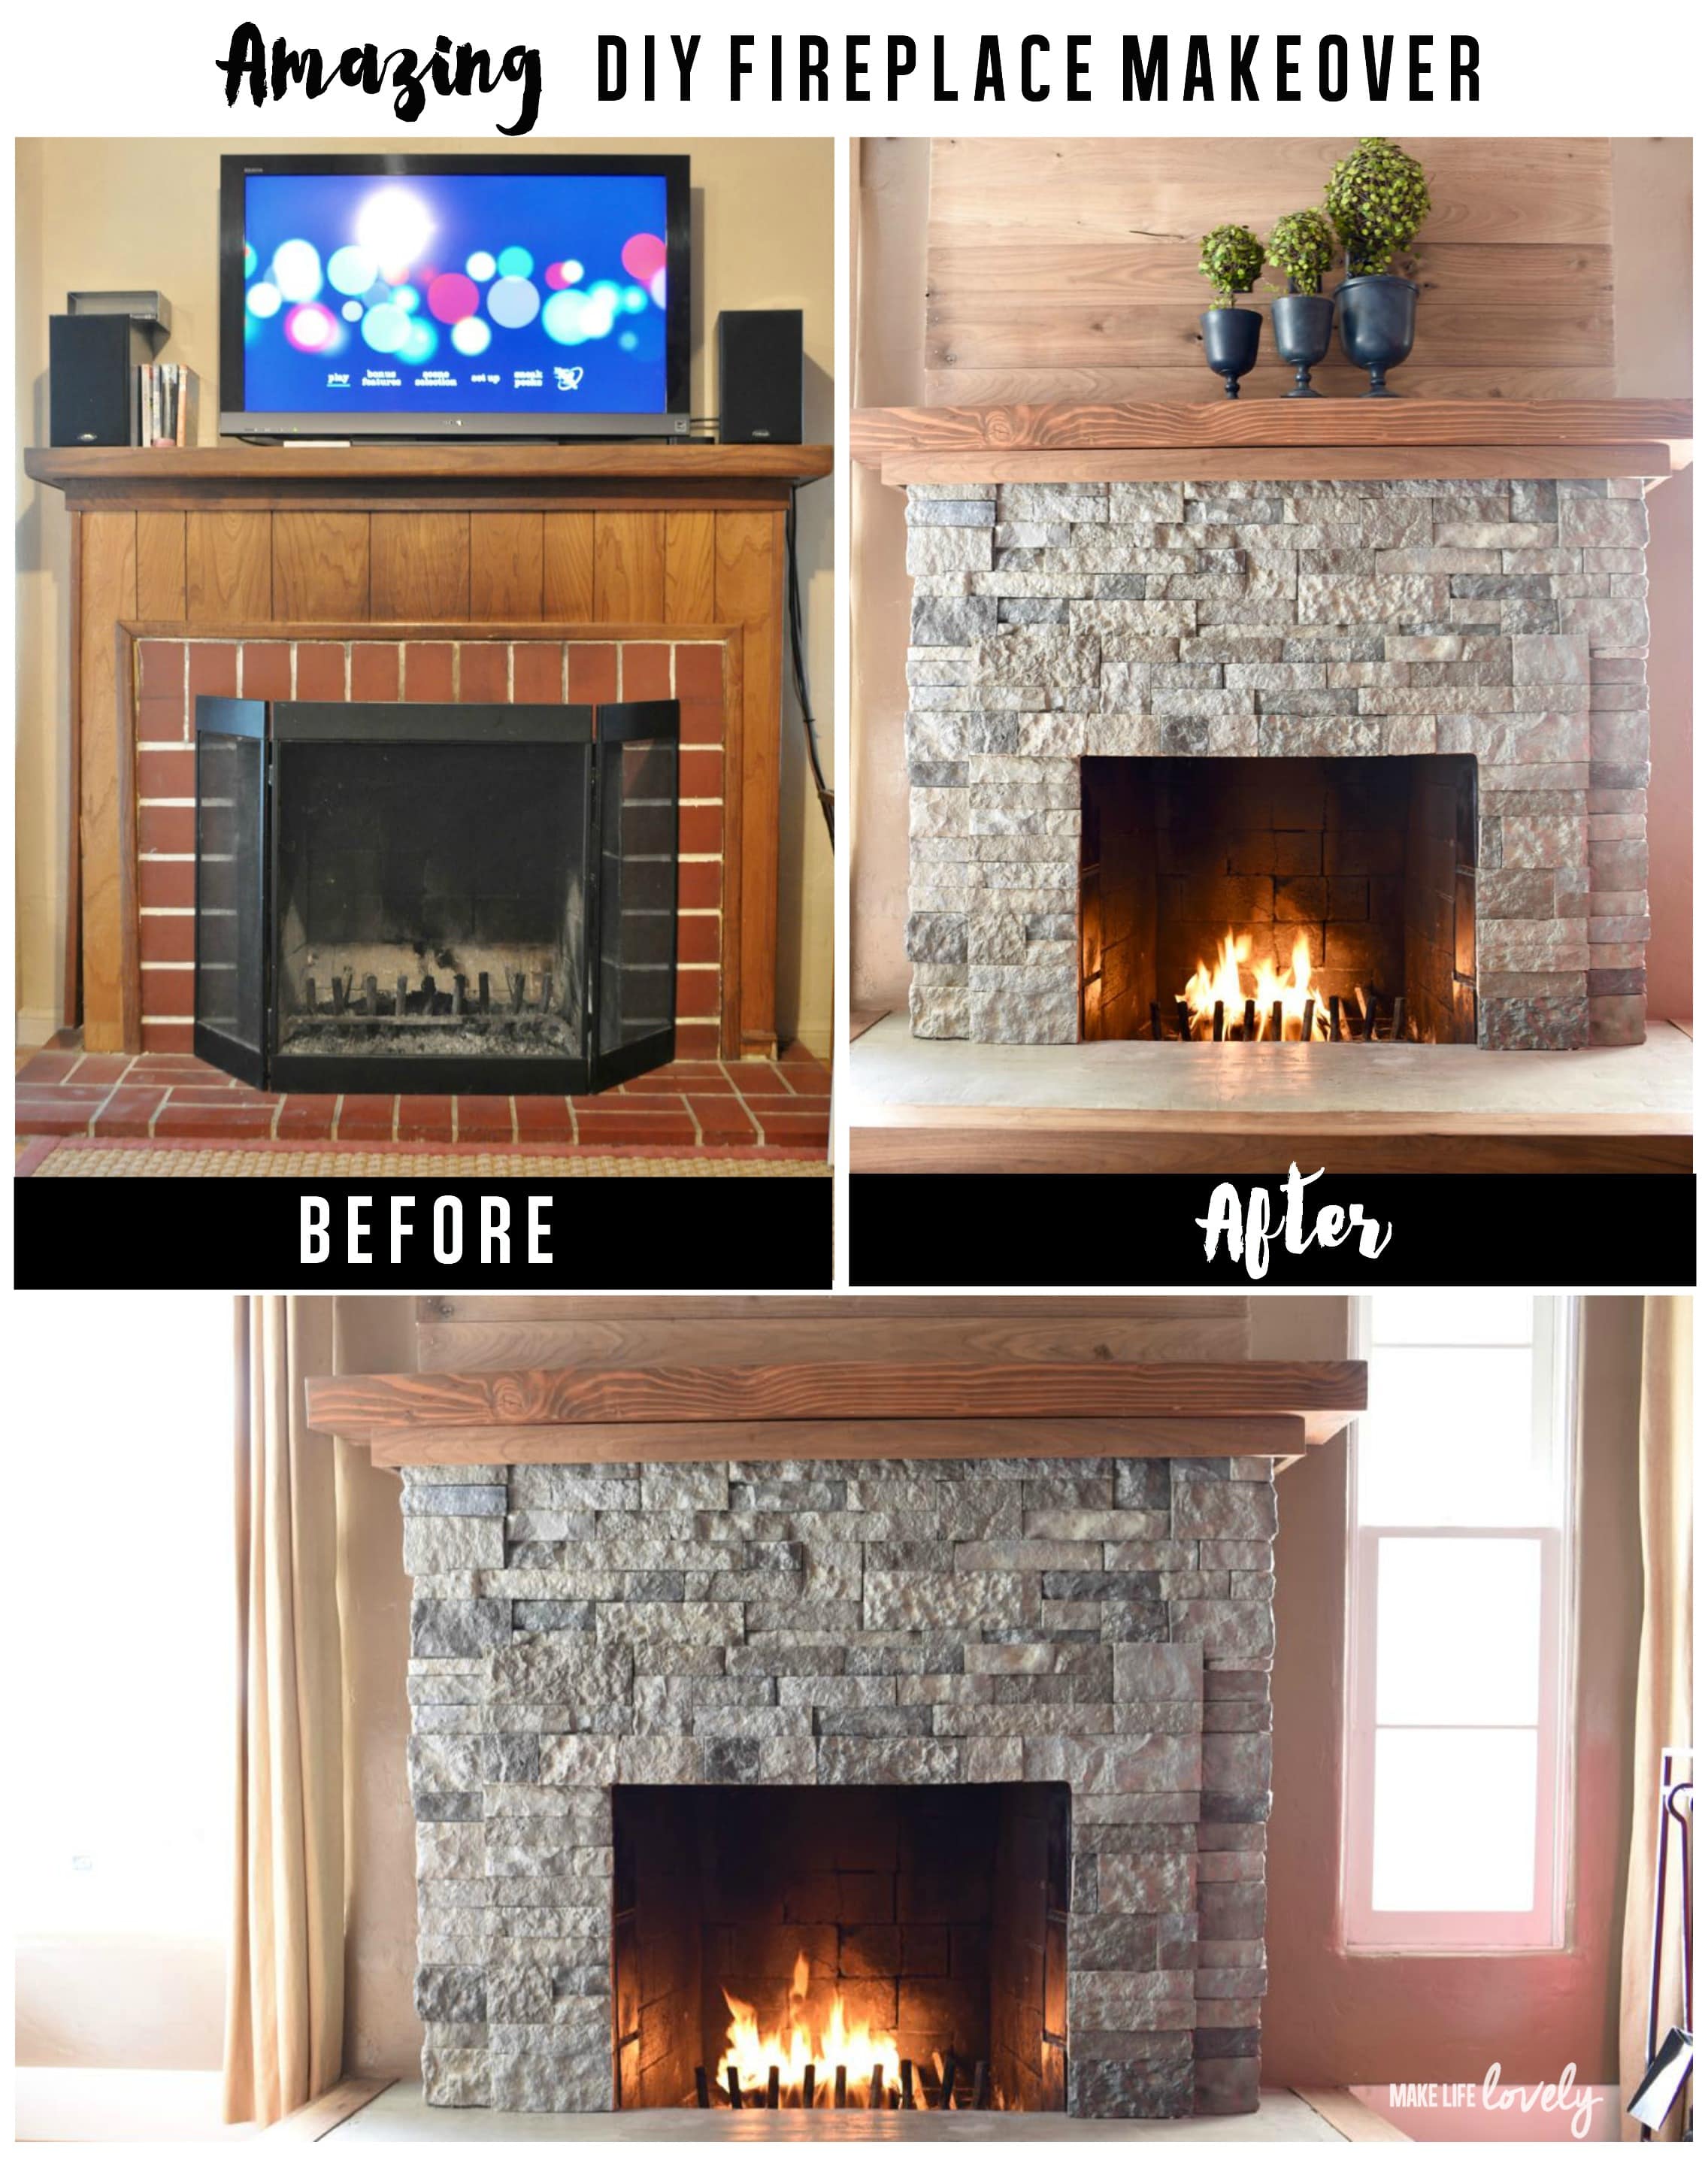
Once the sealer has dried and your tools are put away, it’s time to step back and admire your work. For me, this was the most rewarding part of the entire project. Seeing the transformation from a tired, outdated fireplace to a stunning stone centerpiece made every hour of work worthwhile. A stone fireplace makeover can dramatically change the look and feel of a room, and the best part is knowing that you did it yourself.
What I love most about my new stone fireplace is how it has changed the atmosphere of the entire living room. It feels warmer, and more inviting, and it’s become a natural gathering spot for friends and family. There’s something about the texture and presence of stone that brings a touch of the outdoors inside, and that connection to nature makes the room feel grounded and timeless.
If you’re thinking about tackling a DIY stone fireplace makeover, I encourage you to go for it. It’s a challenging project, but the result is truly transformative. Whether you choose rustic fieldstone or sleek stacked stone, the possibilities are endless, and you’ll be amazed at the difference it makes in your home.

A DIY Stone Veneer Installation- Step By Step – North Star Stone Diy stone fireplace, Faux

Rambling Renovators: One Room Challenge Week 3: Framing Around An Old Fireplace Brick

AirStone Fireplace Makeover {From Ugly to Incredible!}

Rock fireplaces, Painted stone fireplace, Stone

Fireplace Makeover Wood Mantel Build Fireplace Redo, Brick Fireplace Makeover, Limestone

AirStone Fireplace Makeover {From Ugly to Incredible!}

Related Posts:
- Decorate Stone Fireplace for Christmas
- French Country Stone Fireplace
- Stone Fireplace Corner
- Stone Fireplace Fronts
- Fieldstone Fireplace Makeover
- Trim Around Stone Fireplace
- Stone Fireplace Materials
- Stone Fireplace Veneer Over Brick
- Stone Fireplace Kit Indoor
- Outdoor Stone Fireplace Designs
When it comes to home renovations, a stone fireplace makeover can completely transform the look and feel of your living space. Whether you’re looking to update an outdated fireplace or simply want to add some warmth and character to your home, a DIY stone fireplace makeover can be a rewarding project that adds value to your property. In this guide, we’ll take a closer look at the benefits, pros and cons, common mistakes to avoid, and frequently asked questions about DIY stone fireplace makeovers.
Benefits of DIY Stone Fireplace Makeover
One of the main benefits of a DIY stone fireplace makeover is the opportunity to customize the look of your fireplace to suit your personal style and aesthetic preferences. By choosing the type of stone, color, and design elements, you can create a unique focal point in your home that reflects your taste.
Another benefit of a DIY stone fireplace makeover is the potential cost savings compared to hiring a professional contractor. With some research and planning, you can find affordable stone materials and tools to complete the project yourself, saving money on labor costs.
Additionally, updating your fireplace with a stone makeover can increase the resale value of your home. A beautifully designed and well-executed stone fireplace can attract potential buyers and add visual appeal to your living space.
Pros and Cons of DIY Stone Fireplace Makeover
While there are many benefits to undertaking a DIY stone fireplace makeover, there are also some potential drawbacks to consider. One of the main pros of DIY projects is the sense of accomplishment and pride that comes from completing a challenging task yourself. However, it’s important to be realistic about your time, skills, and resources before starting a project like this.
On the other hand, one of the cons of a DIY stone fireplace makeover is the risk of making costly mistakes or errors that could affect the outcome. Without proper planning and research, you may end up with a finished product that doesn’t meet your expectations or requires additional work to fix.
Another potential downside of a DIY project is the time and effort required to complete it. Stone fireplace makeovers can be labor-intensive and time-consuming, so it’s important to set aside enough time for each step of the process.
Common Mistakes to Avoid
One common mistake to avoid when embarking on a DIY stone fireplace makeover is not properly preparing the surface before applying the stone veneer. It’s essential to clean and prime the existing surface to ensure that the adhesive bonds properly with the stone material.
Another mistake to avoid is not measuring accurately or cutting the stone pieces incorrectly. This can result in gaps or uneven surfaces that detract from the overall look of the fireplace.
Additionally, failing to seal the finished fireplace properly can lead to water damage or discoloration over time. It’s important to use a high-quality sealant to protect the stone from moisture and wear.
Finally, rushing through each step of the makeover process without attention to detail can result in an unsatisfactory final result. Take your time, follow instructions carefully, and seek help or advice if needed throughout the project.
Can I install natural stone on my existing brick fireplace?
Yes! You can install natural stone veneer directly onto brick using adhesive mortar and grout for a beautiful updated look.
How long does it take to complete a DIY stone fireplace makeover?
The timeline for completing a stone fireplace makeover depends on factors such as size, complexity of design, skill level, and availability of materials. On average, it may take several days or weeks for a complete transformation.
Do I need special tools or equipment for a DIY stone fireplace makeover?
While some specialized tools may be necessary for cutting and shaping stones, many basic tools such as trowels, levels, brushes, and buckets are typically used for installation.
What type of maintenance is required for a stone fireplace?
To keep your stone fireplace looking its best, regular cleaning with mild soap and water is recommended. Additionally, resealing the stones every few years can help maintain their appearance and durability.
Can I paint or stain natural stone for a different look?
It is not recommended to paint or stain natural stones as it may compromise their natural beauty and texture. Instead, consider exploring different types or colors of stones for variety in appearance.
A DIY stone fireplace makeover can be a rewarding project that adds value and beauty to your home. By customizing the design to suit your style, you can create a unique focal point that enhances the aesthetic of your living space. While there are potential challenges and mistakes to avoid, taking the time to plan and execute the project carefully can result in a stunning finished product that you can enjoy for years to come.
Whether you’re looking to update an outdated fireplace or simply want to add warmth and character to your home, consider a DIY stone fireplace makeover for a transformation that will enhance the overall ambiance of your living space. Overall, a DIY stone fireplace makeover can be a cost-effective and fulfilling project that allows you to personalize your living space and increase the value of your home.
By avoiding common mistakes and taking the time to properly plan and execute each step of the makeover process, you can achieve a stunning finished product that adds beauty and warmth to your home. Remember to consider the pros and cons, research and prepare adequately, and seek help or advice when needed to ensure a successful outcome. With careful attention to detail and creativity, a DIY stone fireplace makeover can truly transform your living space into a cozy and inviting retreat.
Remember, a DIY stone fireplace makeover is a significant project that requires careful planning and execution. It’s important to consider your skills, resources, and time commitment before starting the project. By avoiding common mistakes, such as improper surface preparation, inaccurate measurements, inadequate sealing, and rushing through the process, you can achieve a beautiful and long-lasting result.
If you have any questions or concerns about your DIY stone fireplace makeover, don’t hesitate to seek help or advice from professionals or knowledgeable sources. With proper research, preparation, and attention to detail, you can create a stunning focal point in your home that adds value and personality to your living space. Enjoy the process and the result of transforming your fireplace with a beautiful stone makeover!