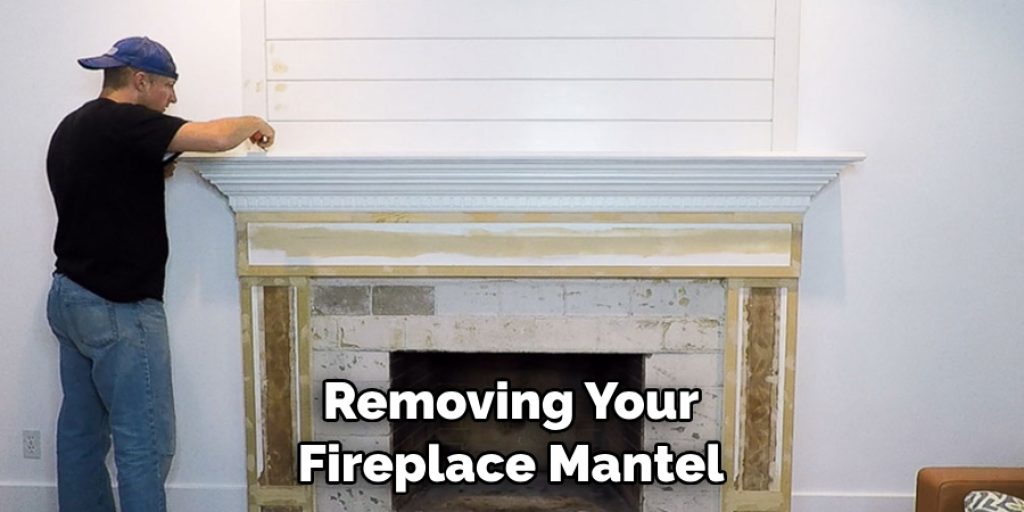
Removing a fireplace mantel is a task that can seem daunting, especially if it’s your first time tackling such a project. Whether you’re looking to update your living space’s aesthetic or repair a damaged mantel, understanding the process and what it entails is crucial. This guide will take you through the steps of removing a fireplace mantel, highlighting the tools you’ll need, safety considerations, and tips for making the process as smooth as possible.

Preparing for Mantel Removal
Assessing the Mantel and Surrounding Area
Before beginning any removal process, assessing the mantel and the surrounding area is essential. Determine your type of mantel—whether it’s a floating mantel, one attached to a fireplace surround, or a mantel with legs. Each type has different removal requirements. Check if the mantel is part of a larger, integrated structure or if it stands alone. This initial assessment helps you plan the appropriate removal strategy.
Inspect the condition of the fireplace and mantel. Look for signs of damage, such as cracks, chips, or water damage. This inspection will give you an idea of any additional repairs that may be needed once the mantel is removed. Additionally, identify any electrical or gas lines that might run through or near the mantel. This is crucial to avoid any dangerous mishaps during removal.
Take measurements of the mantel and the space it occupies. This information is useful if you plan to replace the mantel with a new one or if you need to patch up the area after removal. It also helps in understanding how much space you’ll need for tools and movement during the project.

Gathering Necessary Tools and Materials
Once you’ve assessed the mantel and surrounding area, gather all necessary tools and materials. Common tools for removing a fireplace mantel include a crowbar, a hammer, a utility knife, a screwdriver, and safety gear like gloves and goggles. Depending on the mantel type and how it’s attached, you might also need a reciprocating saw or an electric drill.
Having the right materials on hand is equally important. Drop cloths or tarps are essential for protecting your floor and furniture from dust and debris. You might also need patching materials, such as spackle or wood filler, to repair any damage to the wall or fireplace surround after the mantel is removed.
If the mantel is heavy or awkwardly shaped, consider enlisting help. Having an extra pair of hands can make the removal process safer and more manageable. Ensure that your helpers are also equipped with safety gear and understand the removal plan.
Ensuring Safety Precautions
Safety should always be a top priority when undertaking home improvement projects. Before you start, clear the area around the fireplace. Remove any decorative items, furniture, or rugs that might get in the way or be damaged during the removal process. Ensure adequate ventilation, especially if you’re working with tools that produce dust or fumes.
Wear appropriate safety gear. Safety goggles protect your eyes from dust and debris, while gloves safeguard your hands from sharp edges and splinters. If you’re using power tools, wearing ear protection is also advisable. Always follow the manufacturer’s safety instructions for any tools and materials you use.
Turn off any electrical or gas lines that might run through or near the fireplace. If you’re unsure about the location of these lines, it’s wise to consult a professional. This step is critical to prevent accidents, such as electric shocks or gas leaks, during the removal process.

Step-by-Step Mantel Removal Process
Detaching the Mantel from the Wall
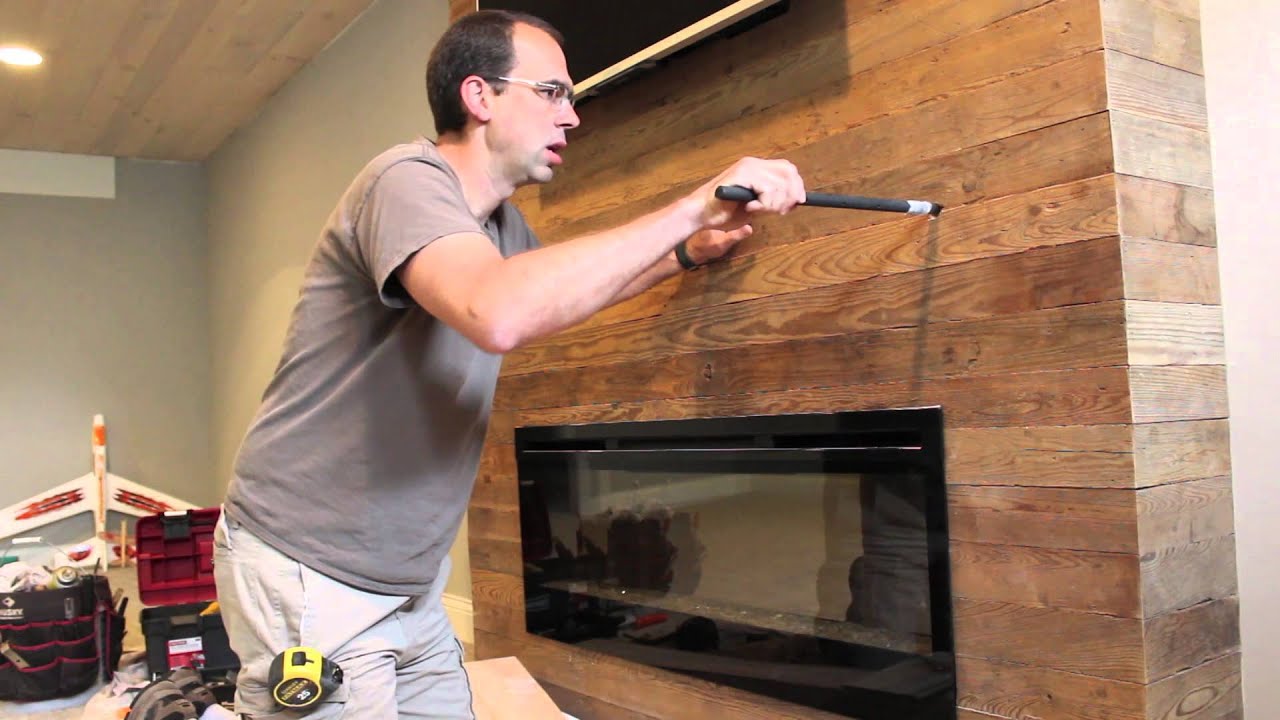
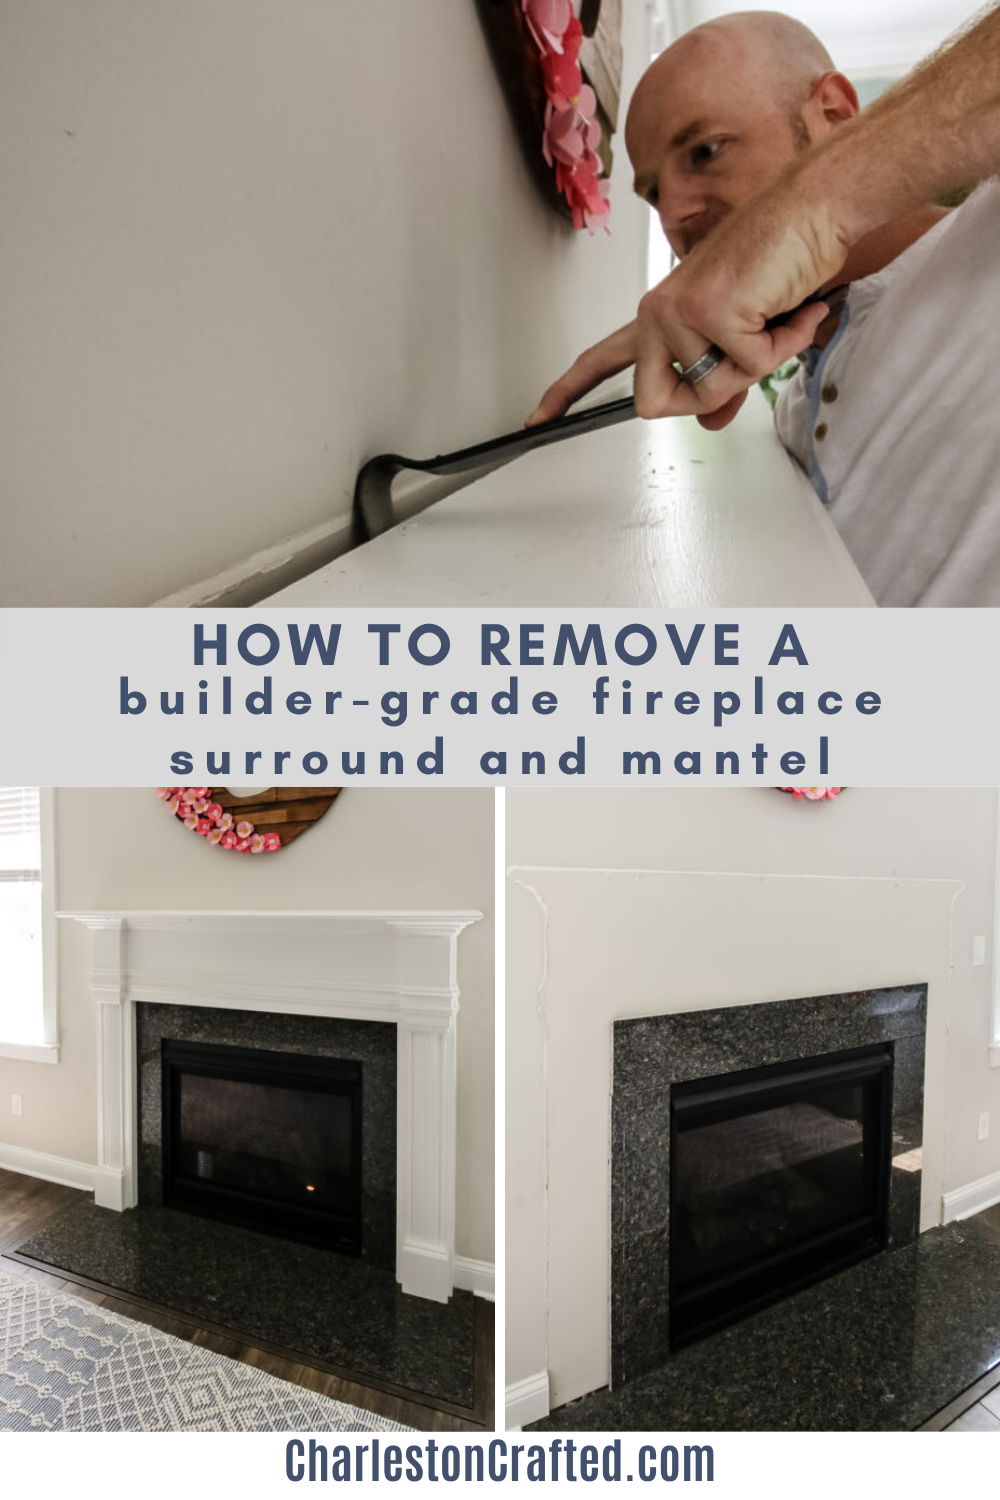
Begin the mantel removal process by detaching it from the wall. If the mantel is secured with screws or nails, use a screwdriver or hammer to remove them. In some cases, the screws might be hidden behind decorative covers, so inspect the mantel thoroughly. If the mantel is glued or caulked to the wall, use a utility knife to cut through the adhesive.
Work slowly and carefully to avoid damaging the wall or surrounding structures. If the mantel is attached to a brick or stone fireplace, be especially cautious. Removing screws or nails from these materials can be more challenging and may require additional tools or techniques.
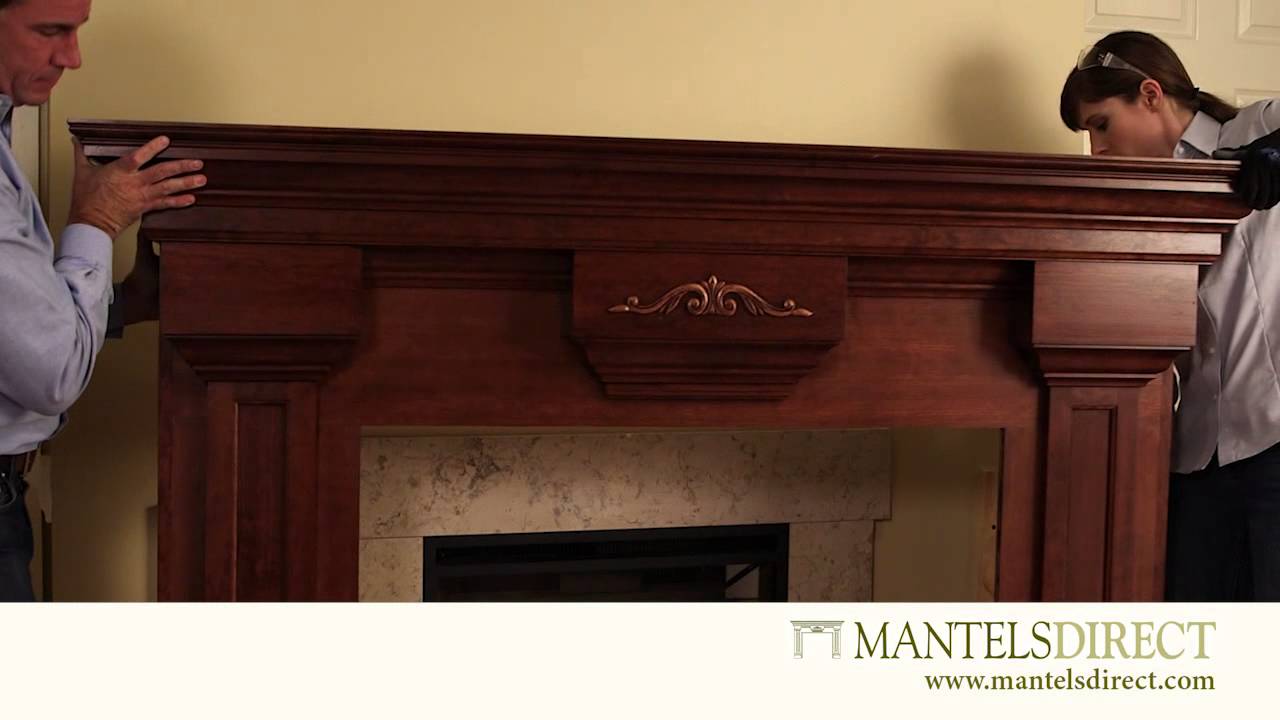
As you detach the mantel, have a helper support its weight. This prevents the mantel from falling and causing damage or injury. Once all the fasteners are removed, gently wiggle the mantel to loosen it from the wall. If it doesn’t budge, double-check for any remaining screws, nails, or adhesive.
Interesting Articles You May Want to Check:
- Beach Fireplace Mantel Ideas
- Dimplex Newport Electric Fireplace Mantel Package
- Fireplace Mantel Scarves Christmas
- Black Fireplace Mantel Ideas
- Old Wood Fireplace Mantels
Removing a Mantel with Legs
Mantels with legs often require a slightly different removal approach. Start by removing any decorative elements or trim pieces that might conceal the fasteners. Use a screwdriver or hammer to remove the screws or nails securing the legs to the floor or wall. If the legs are glued, carefully cut through the adhesive with a utility knife.
Once the legs are detached, focus on the mantel shelf. Follow the same steps as you would for a floating mantel, ensuring that all screws, nails, and adhesive are removed. If the legs are part of an integrated structure, you might need to detach the entire assembly at once. This can be more challenging and may require additional tools, such as a reciprocating saw.
If the mantel is particularly heavy or unwieldy, consider enlisting help to support it during removal. This ensures that the mantel is removed safely and without causing damage to the surrounding area. Once the mantel and legs are detached, carefully lift them away from the fireplace.
Dealing with Stubborn Mantels
Sometimes, mantels can be stubborn and difficult to remove, especially if they’ve been in place for many years or are heavily secured. If you’re struggling to detach the mantel, try using a crowbar to gently pry it away from the wall. Place a piece of scrap wood between the crowbar and the wall to prevent damage.
For mantels attached with heavy-duty screws or bolts, you might need to use a reciprocating saw to cut through the fasteners. Be sure to wear appropriate safety gear and follow the manufacturer’s instructions when using power tools. Work slowly and carefully to avoid damaging the wall or fireplace surround.
If the mantel is still not budging, double-check for any hidden fasteners or adhesive. Use a flashlight to inspect hard-to-see areas and ensure that all screws, nails, and adhesive have been removed or cut through. In some cases, it might be necessary to call in a professional to assist with particularly stubborn mantels.
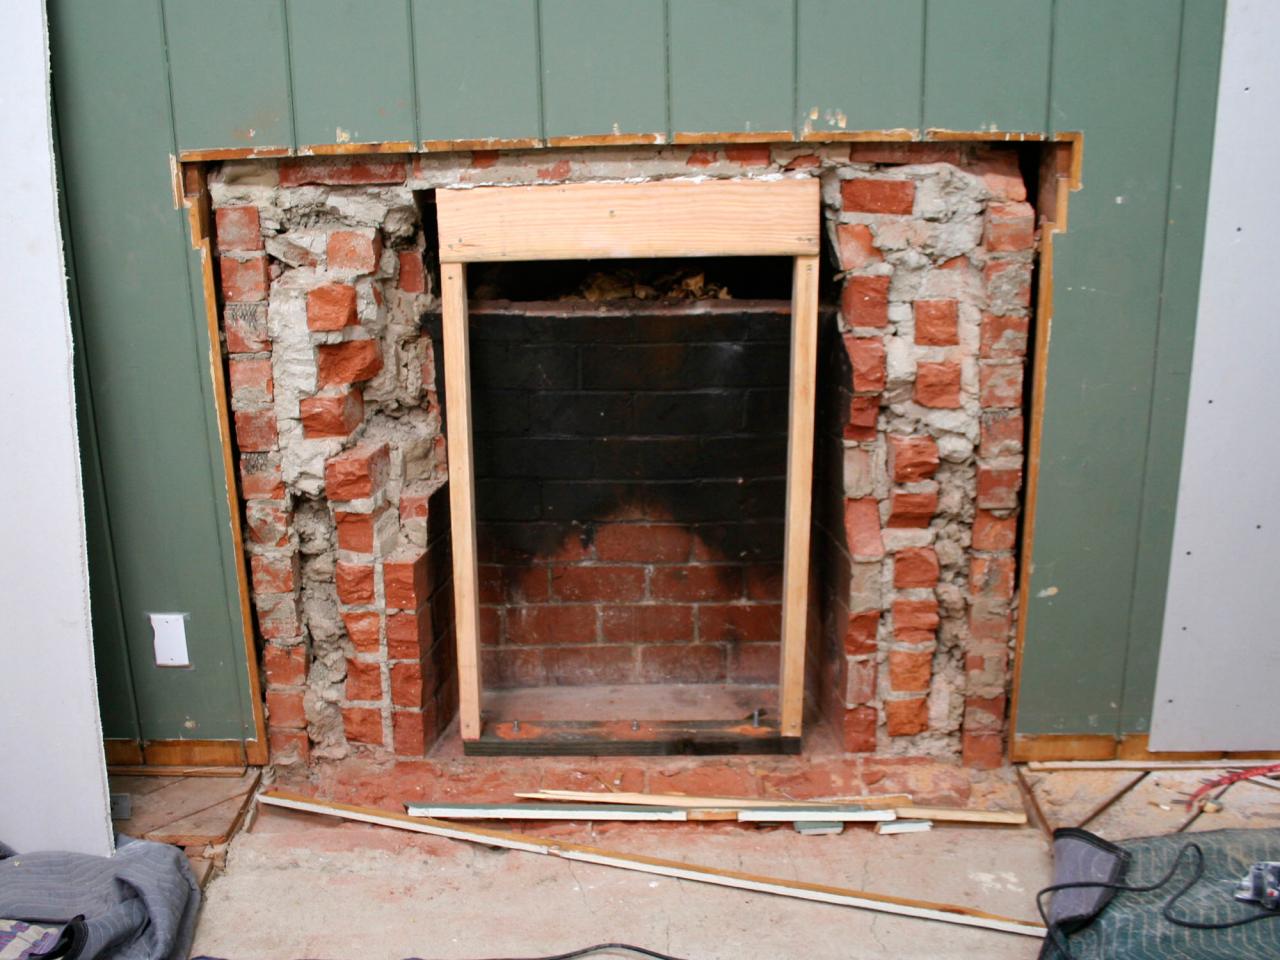
Post-Removal Considerations
Patching and Repairing the Wall
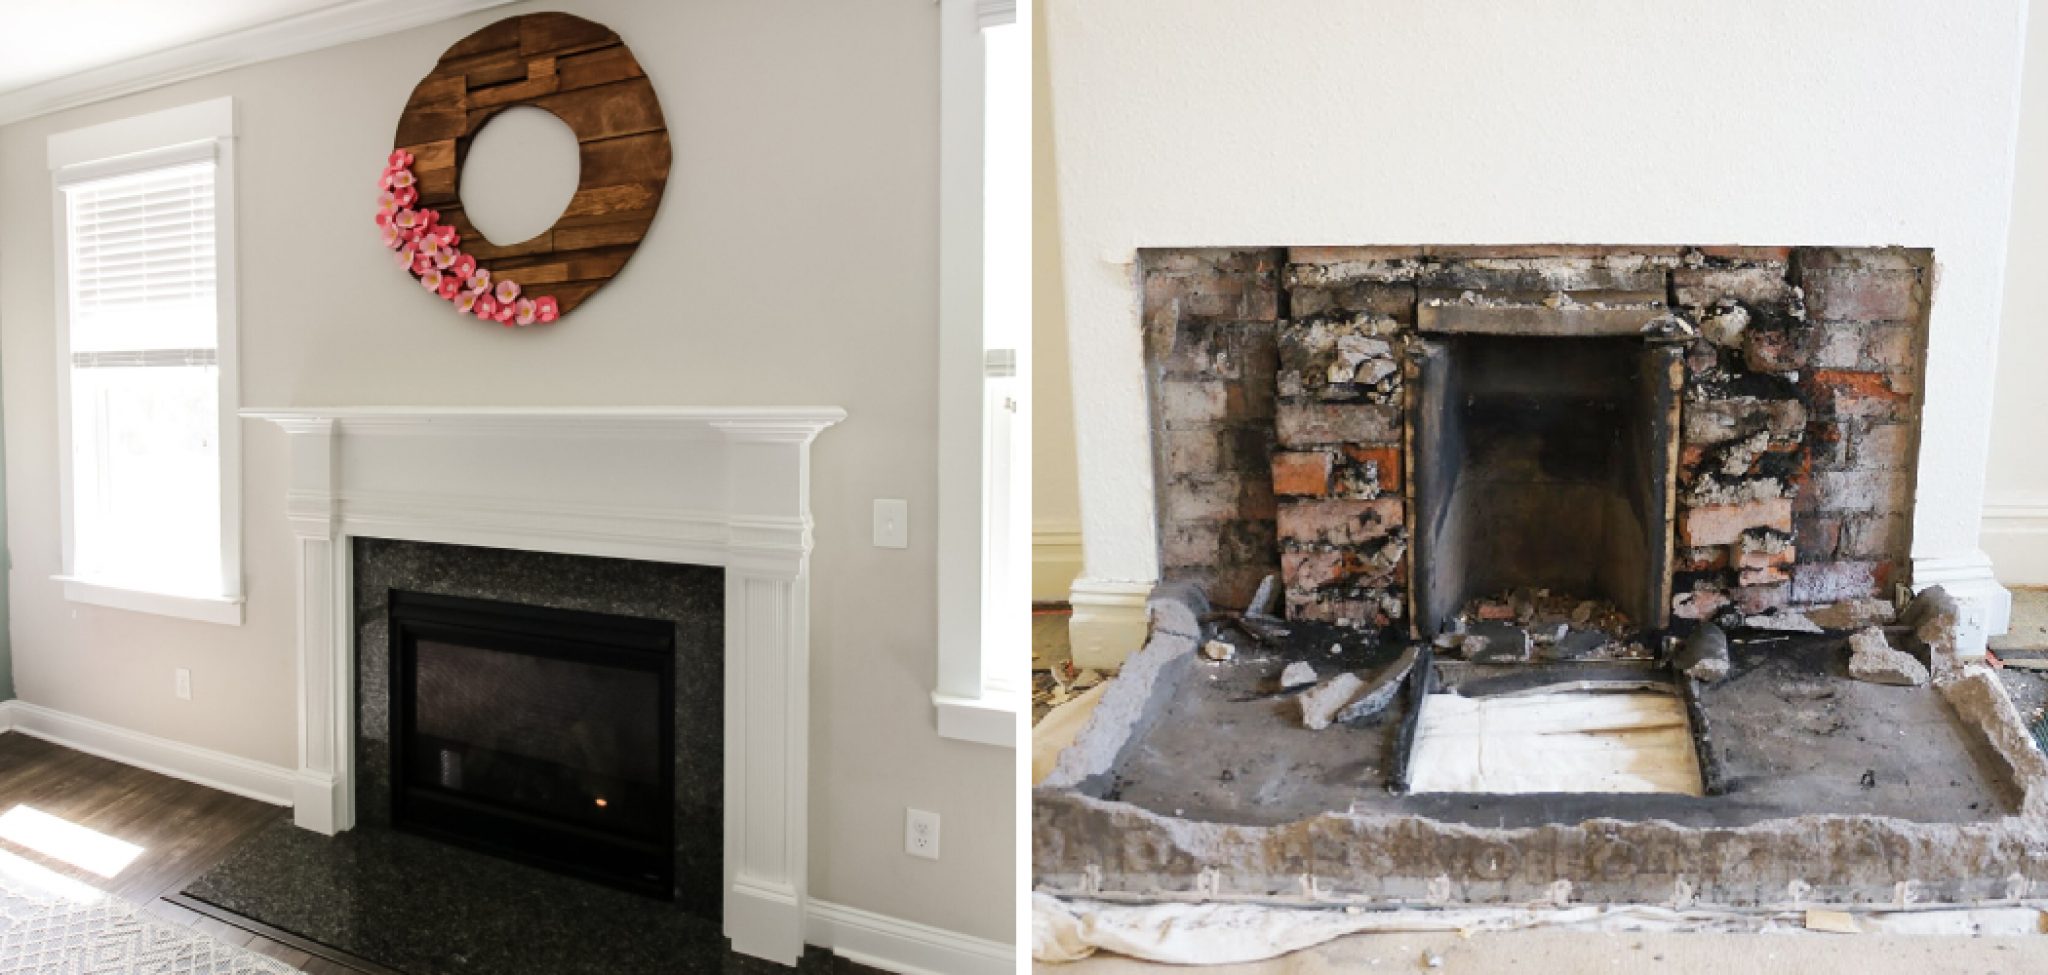
After the mantel is removed, you’ll likely need to patch and repair the wall or fireplace surround. Start by cleaning the area to remove any dust, debris, or adhesive residue. Use a scraper or putty knife to smooth out any rough spots or leftover adhesive.
Next, assess the extent of the damage. If there are small holes or cracks, use spackle or wood filler to patch them up. Apply the filler with a putty knife, smoothing it out to create an even surface. Allow the filler to dry according to the manufacturer’s instructions, then sand it down until it’s flush with the surrounding wall.
For larger holes or more significant damage, you might need to use a patch kit. These kits typically include a mesh patch and joint compound. Apply the patch over the hole, then cover it with joint compound. Smooth out the compound with a putty knife, allow it to dry, and sand it down to create a smooth surface.

Cleaning and Preparing for a New Mantel
Once the wall is patched and repaired, it’s time to clean and prepare the area for a new mantel or other decorative elements. Start by thoroughly cleaning the fireplace and surrounding area. Use a vacuum or broom to remove any remaining dust and debris. Wipe down the surfaces with a damp cloth to ensure they’re clean and free of residue.
If you plan to paint or wallpaper the area, now is the time to do so. Choose a paint color or wallpaper pattern that complements your new mantel or desired aesthetic. Be sure to follow the manufacturer’s instructions for application and drying times.
If you’re installing a new mantel, measure the space carefully to ensure a proper fit. Follow the manufacturer’s instructions for installation, making sure to use appropriate fasteners and adhesive. If you’re not confident in your ability to install the new mantel, consider hiring a professional to ensure it’s done correctly and safely.

Common Mistakes to Avoid
Skipping the Initial Assessment
One common mistake when removing a fireplace mantel is skipping the initial assessment. Failing to properly evaluate the mantel and surrounding area can lead to unexpected challenges during the removal process. Always take the time to inspect the mantel, identify any potential issues, and gather the necessary tools and materials before starting.
Ignoring Safety Precautions
Another mistake is ignoring safety precautions. Removing a fireplace mantel can be hazardous, especially if you’re dealing with heavy materials or using power tools. Always wear appropriate safety gear, clear the area of any obstacles, and turn off any electrical or gas lines before starting the removal process.
Using the Wrong Tools
Using the wrong tools for the job is a common error. Ensure you have the appropriate tools for removing your specific type of mantel. For example, using a hammer and chisel on a glued mantel might not be as effective as a utility knife. Take the time to gather the right tools and understand how to use them safely.
Rushing the Removal Process
Rushing through the removal process can lead to mistakes and potential damage. Take your time to carefully detach the mantel, ensuring all screws, nails, and adhesive are removed before attempting to lift it away. Working slowly and methodically reduces the risk of injury and damage to the surrounding area.
Neglecting Post-Removal Repairs
Finally, neglecting post-removal repairs can result in an unfinished and unappealing appearance. After removing the mantel, always take the time to patch and repair the wall or fireplace surround. Properly cleaning and preparing the area for a new mantel or decorative elements ensures a polished and professional result.
What tools do I need to remove a fireplace mantel?
Removing a fireplace mantel typically requires a variety of tools, including a crowbar, hammer, utility knife, screwdriver, and safety gear such as gloves and goggles. Depending on the mantel type and how it’s attached, you might also need a reciprocating saw or an electric drill. Having drop cloths or tarps to protect your floor and furniture is also essential. Each project might have unique needs, so assess your specific situation to determine if additional tools are necessary.
Can I remove a fireplace mantel by myself?
While it’s possible to remove a fireplace mantel by yourself, having an extra pair of hands can make the process safer and more manageable. Mantels can be heavy and awkward to handle, and having help can prevent injury and damage. Ensure your helpers are equipped with safety gear and understand the removal plan. For particularly large or complex mantels, professional assistance might be advisable.
How do I know if my mantel is attached with screws or adhesive?
To determine how your mantel is attached, closely inspect the area where the mantel meets the wall or fireplace surround. Look for visible screws or nails, which can be removed with a screwdriver or hammer. If you don’t see any fasteners, the mantel might be glued or caulked. In this case, use a utility knife to cut through the adhesive. If you’re unsure, gently wiggle the mantel to see if it moves; glued mantels may not budge as easily as those secured with screws.
What should I do if the mantel is stuck?
If the mantel is stuck and not budging despite removing visible screws or nails, use a crowbar to gently pry it away from the wall. Place a piece of scrap wood between the crowbar and the wall to prevent damage. For mantels attached with heavy-duty screws or bolts, you might need to use a reciprocating saw to cut through the fasteners. Double-check for any hidden fasteners or adhesive, and consider professional help if the mantel remains stubborn.
How do I repair the wall after removing the mantel?
After removing the mantel, clean the area to remove any dust, debris, or adhesive residue. Use a scraper or putty knife to smooth out rough spots. For small holes or cracks, apply spackle or wood filler with a putty knife, smoothing it out to create an even surface. Allow the filler to dry, then sand it down. For larger holes, use a patch kit that includes a mesh patch and joint compound. Apply the patch over the hole, cover it with joint compound, smooth it out, let it dry, and sand it down. Finally, clean the area thoroughly and proceed with painting or other finishing touches.

Related Posts: