DIY Fireplace Tile Makeover
Giving your fireplace a tile makeover is one of the most rewarding DIY projects you can tackle in your home. Not only does it breathe new life into an outdated or uninspired fireplace, but it also creates a stunning focal point that enhances the overall ambiance of your living space. Whether you’re aiming for a sleek modern look, a cozy rustic feel, or something in between, there are countless options and techniques to explore. Here’s a comprehensive guide to help you navigate the process.

Choosing the Right Tile for Your Fireplace Makeover
The first step in any fireplace tile makeover is selecting the right tile. This choice will set the tone for the entire project, so it’s essential to consider both aesthetics and functionality.
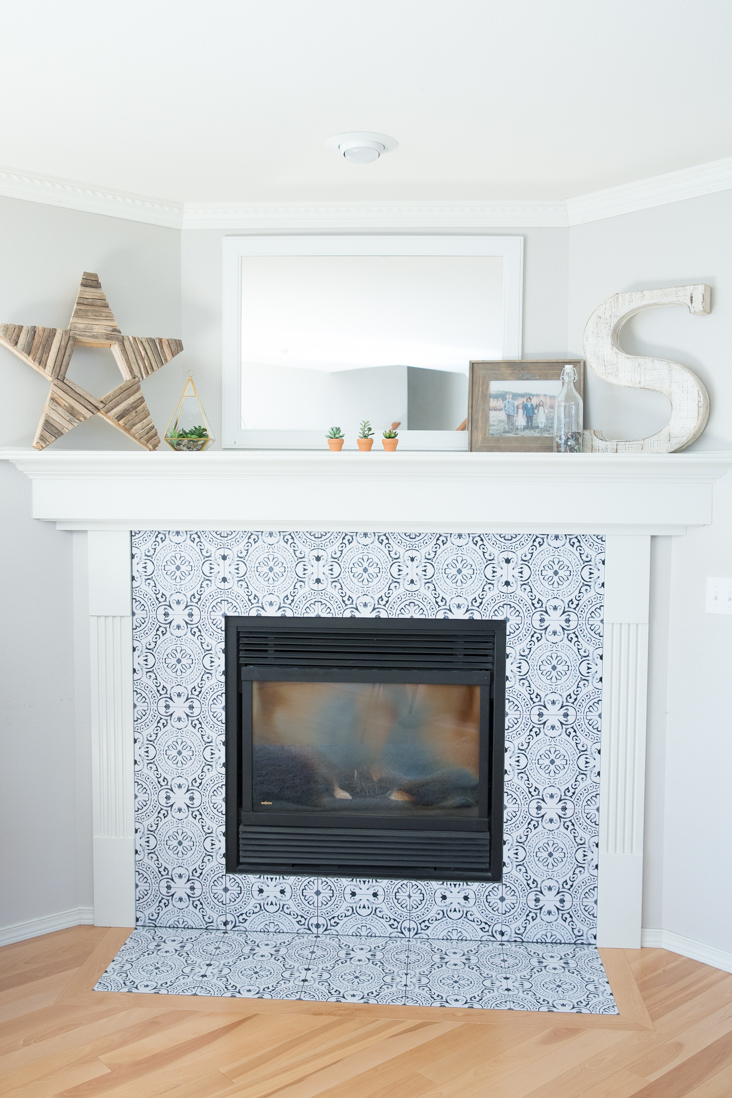
Aesthetics: The style of tile you choose will largely depend on the look you want to achieve. If you’re going for a modern, minimalist vibe, sleek glass tiles or large-format porcelain tiles might be your go-to. For a more rustic or traditional look, consider natural stone tiles like slate or travertine. Patterned tiles, such as Moroccan or encaustic designs, can add a bold statement to a neutral space. Whatever style you choose, make sure it complements the rest of your room’s decor.
Durability: Fireplaces are high-heat areas, so it’s crucial to choose tiles that can withstand temperature fluctuations. Ceramic, porcelain, and natural stone tiles are all excellent choices as they are heat-resistant and durable. Avoid using tiles that are not rated for high temperatures, as they can crack or discolor over time.
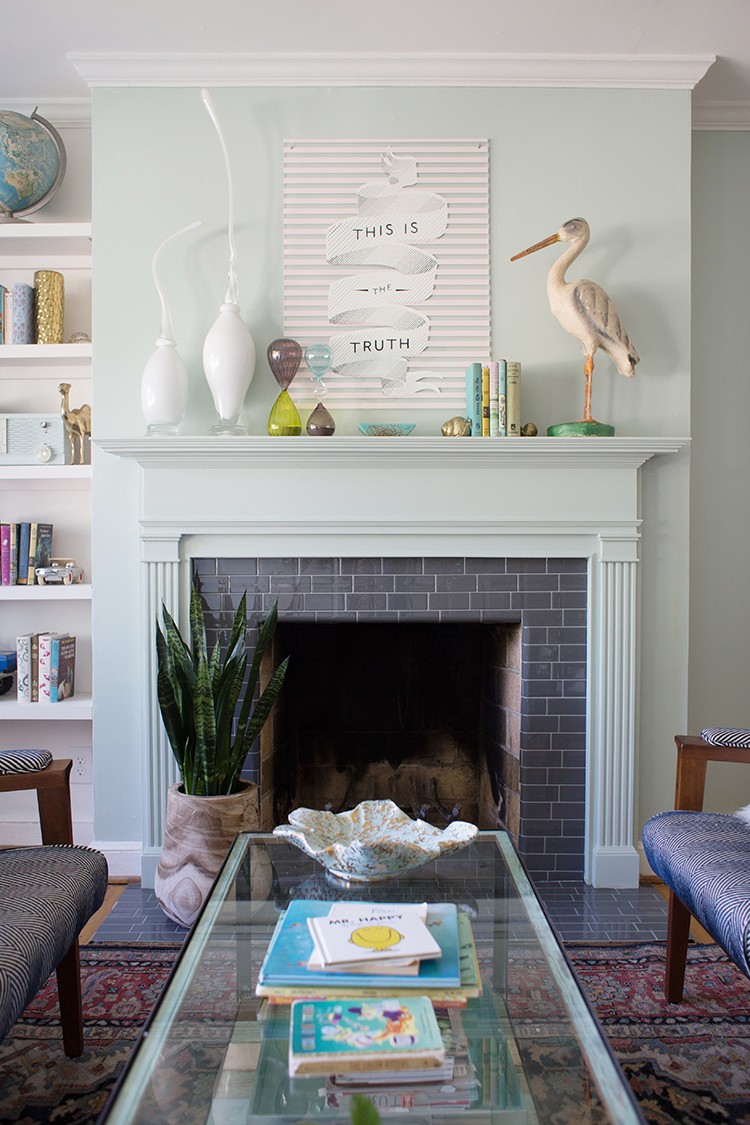
Color: The color of your tiles will influence the mood of the room. Light-colored tiles can make a small room feel more spacious and airy, while darker tones can create a cozy, intimate atmosphere. If you’re working with a neutral palette, adding a pop of color through the tile can serve as a beautiful contrast.

Texture: Tiles come in various textures, from smooth and glossy to rough and matte. Smooth, glossy tiles are easier to clean, making them a good option for the hearth, where soot and ash may accumulate. Textured tiles, on the other hand, can add visual interest and a tactile element, but they might require more maintenance.
Size and Shape: The size and shape of your tiles will affect the overall look of your fireplace. Large-format tiles can create a sleek, seamless appearance, while smaller mosaic tiles can add intricate detail. Rectangular tiles laid in a herringbone or chevron pattern can bring a dynamic, modern twist to a traditional design.
Budget: Finally, consider your budget. While natural stone tiles can be more expensive, they offer a timeless appeal that can increase the value of your home. Ceramic and porcelain tiles are more affordable but still offer a wide range of styles and colors to choose from.
Preparing Your Fireplace for a Tile Makeover
Preparation is key to ensuring your fireplace tile makeover goes smoothly. Skipping steps or rushing through this phase can lead to issues down the line, so take the time to do it right.
Cleaning the Surface: Before you begin, make sure your fireplace surface is clean and free of any dirt, soot, or old adhesive. Use a heavy-duty cleaner or a mixture of water and mild detergent to scrub the surface thoroughly. If you’re working with an older fireplace, you may need to remove any existing tiles or materials first.
Assessing the Surface: After cleaning, inspect the surface for any cracks, chips, or uneven areas. These need to be repaired before you start tiling, as an uneven surface can cause tiles to crack or pop off over time. Use a patching compound to fill in any gaps or holes, and sand the surface smooth once it’s dry.
Sealing the Surface: Depending on the type of material your fireplace is made of, you may need to apply a sealant before tiling. This is especially important for porous materials like brick or stone, which can absorb moisture from the tile adhesive, causing it to weaken over time.

Creating a Template: If you’re using a complex tile pattern or mosaic, it’s a good idea to create a template on paper first. This allows you to visualize the final result and make any adjustments before you start adhering tiles to the wall. It also helps ensure that your tiles are spaced evenly and that you have enough tiles to complete the project.
Gathering Your Tools and Materials: Before you begin tiling, make sure you have all the necessary tools and materials on hand. This includes tile adhesive, a notched trowel, a tile cutter or wet saw, spacers, grout, a grout float, and a sponge. Having everything ready will make the process smoother and more efficient.
Measuring and Marking: Measure the area of your fireplace to determine how many tiles you’ll need. Mark the center of your fireplace as a reference point to ensure that your tiles are evenly distributed. Use a level to draw straight lines on the surface, which will serve as guides when laying the tiles.

Laying the Tile: Step-by-Step Process
Once your surface is prepped, it’s time to start laying the tiles. This part of the process requires patience and precision to achieve a professional-looking finish.
Applying the Adhesive: Start by applying a thin layer of tile adhesive to a small section of the fireplace using a notched trowel. Spread the adhesive evenly, working in small sections to prevent it from drying out before you place the tiles. The notches in the trowel create grooves in the adhesive, which help the tiles bond more securely.
Placing the Tiles: Begin laying your tiles from the center of the fireplace, working your way outward. Press each tile firmly into the adhesive, using spacers to ensure consistent gaps between the tiles. These gaps are important for grout application later. If you’re using a patterned tile or a specific layout, refer to your template as you go to ensure accuracy.
Cutting Tiles: As you reach the edges of the fireplace, you may need to cut tiles to fit. A tile cutter or wet saw can be used for this purpose. Measure the area where the tile needs to fit, mark the tile, and make the cut. Be sure to wear safety goggles and gloves when cutting tiles to protect yourself from debris.

Checking Alignment: As you lay the tiles, regularly check that they are level and aligned properly. Adjust the tiles as needed before the adhesive sets. If any adhesive oozes out between the tiles, wipe it away with a damp sponge before it dries.
Allowing to Set: Once all the tiles are in place, allow the adhesive to set for at least 24 hours. This ensures that the tiles are securely bonded to the surface before you move on to the next step.
Removing Spacers: After the adhesive has set, carefully remove the spacers from between the tiles. Be gentle to avoid shifting or damaging the tiles.
Grouting Your Fireplace Tiles
Grouting is the process of filling the gaps between the tiles, which not only secures the tiles but also gives your fireplace a polished, finished look.
Choosing the Right Grout: There are various types of grout available, including sanded, unsanded, and epoxy grout. Sanded grout is ideal for larger gaps, as it’s more durable and resistant to cracking. Unsanded grout is best for narrower joints, while epoxy grout offers superior stain resistance and durability, making it a great choice for fireplaces.
Mixing the Grout: If you’re using powdered grout, you’ll need to mix it with water according to the manufacturer’s instructions. The consistency should be similar to peanut butter—not too runny, but not too thick. Make sure to mix only as much as you can apply in about 30 minutes, as grout can begin to harden if left too long.
Applying the Grout: Use a grout float to apply the grout over the tiles, working it into the gaps between them. Hold the float at a 45-degree angle and press the grout firmly into the joints, ensuring that all gaps are filled. Work in small sections, as grout can start to dry quickly.
Wiping Away Excess Grout: Once the grout is applied, use a damp sponge to wipe away any excess from the surface of the tiles. Rinse the sponge frequently to keep it clean and prevent grout from smearing across the tiles. Be careful not to remove too much grout from the joints during this process.
Smoothing the Grout Lines: After wiping away the excess grout, use the edge of the grout float or your finger to smooth the grout lines. This will help create a neat, professional finish. Allow the grout to set for about 24 hours before proceeding to the final cleaning.
Final Cleaning: Once the grout has fully cured, use a dry cloth to buff away any grout haze that may have formed on the surface of the tiles. This haze can dull the appearance of the tiles, so it’s important to remove it for a clean, polished look.

Sealing and Finishing Your Fireplace Tiles
Sealing your grout and tiles is a crucial step in ensuring the longevity and durability of your fireplace makeover. It protects against stains, moisture, and heat damage, keeping your tiles looking fresh and new for years to come.
Choosing the Right Sealer: There are different types of sealers available, including penetrating sealers and surface sealers. Penetrating sealers absorb into the grout and tile, protecting within, while surface sealers create a protective layer on top. Choose a sealer that is specifically designed for use in fireplaces or high-heat areas.
Applying the Sealer: Follow the manufacturer’s instructions for applying the sealer. Generally, you’ll use a small brush or applicator pad to apply the sealer evenly over the grout and tiles. Make sure to cover all surfaces thoroughly, and apply multiple coats if necessary, allowing each coat to dry before applying the next.
Polishing the Tiles: After the sealer has dried, you can give your tiles a final polish to enhance their shine and bring out their natural beauty. Use a soft cloth to buff the tiles, working in circular motions. This step is especially important if you’ve used natural stone tiles, which can benefit from a little extra care to bring out their unique characteristics.
Decorative Finishing Touches: Now that your tiles are sealed and polished, you can add any final decorative touches to complete the look. Consider adding a mantel or trim to frame the fireplace, or accessorize with candles, vases, or artwork to highlight your new focal point.
Regular Maintenance: To keep your fireplace tiles looking their best, establish a regular maintenance routine. This might include wiping down the tiles with a damp cloth to remove dust and debris, reapplying sealer every few years, and addressing any cracks or chips as soon as they appear.
Enjoying the Transformation: With the makeover complete, take a moment to step back and admire your work. The new tiles have transformed your fireplace into a stunning focal point, adding warmth and character to your living space.

Incorporating Unique Design Ideas
For those looking to add a unique twist to their fireplace tile makeover, there are endless design possibilities to explore. Here are a few ideas to spark your creativity.
Mixing and Matching Tiles: Don’t feel limited to using just one type of tile. Mixing and matching different tiles can create a striking, one-of-a-kind design. For example, you could combine large-format tiles with smaller mosaic tiles, or mix glossy and matte finishes for added depth and texture.
Creating a Mosaic: A mosaic design can turn your fireplace into a true work of art. Whether you opt for a traditional pattern or a custom design, a mosaic can add a touch of elegance and sophistication. Consider using different colored tiles to create a gradient effect or a bold geometric pattern.
Adding a Tile Border: A tile border around the edge of your fireplace can frame the design and add a touch of contrast. Choose a border tile that complements the main tiles but stands out just enough to create visual interest. This could be a different color, texture, or pattern.
Incorporating Metallic Tiles: Metallic tiles, such as those with a copper, bronze, or silver finish, can add a touch of glamour to your fireplace. These tiles reflect light, creating a shimmering effect that can make your fireplace the centerpiece of the room.
Using Reclaimed Tiles: For a more sustainable and unique approach, consider using reclaimed tiles. These tiles often have a rich history and character, adding a sense of nostalgia and warmth to your fireplace. You can source reclaimed tiles from salvage yards, antique shops, or online marketplaces.
Experimenting with Grout Color: Grout is often seen as a functional necessity, but it can also be used as a design element. Experimenting with different grout colors can dramatically change the look of your tiles. A contrasting grout color can make the tiles pop, while a matching grout color creates a seamless, cohesive look.

Common Mistakes to Avoid
Skipping Surface Preparation: One of the most common mistakes is not properly preparing the fireplace surface before tiling. Failing to clean, level, or repair the surface can lead to issues like uneven tiles, weak adhesion, and ultimately, a less durable finish. Always take the time to prep your surface thoroughly.
Using Inappropriate Tiles: Not all tiles are suitable for fireplace use. Using tiles that aren’t rated for high temperatures can result in cracking, discoloration, or worse. Always choose heat-resistant tiles specifically designed for use on fireplaces.
Incorrect Tile Adhesive Application: Applying too much or too little adhesive can cause problems. Too much adhesive can make it difficult to achieve even tile placement, while too little can result in weak adhesion. Use a notched trowel and follow the manufacturer’s guidelines for the best results.
Neglecting Grout Sealing: Skipping the step of sealing your grout can lead to stains, moisture damage, and deterioration over time. Grout sealant protects against these issues and helps maintain the appearance of your tiles. Always seal your grout after it has cured.
Rushing the Process: A fireplace tile makeover is not a project to rush. Each step, from surface preparation to tiling, grouting, and sealing, requires time and attention to detail. Rushing can lead to mistakes that are costly and time-consuming to fix.
Inadequate Planning: Not having a clear plan or template before you start tiling can result in a disorganized and unattractive design. Take the time to plan your layout, measure accurately, and create a template if needed. This will help you achieve a professional-looking finish.

What type of tile is best for a fireplace makeover?
The best type of tile for a fireplace makeover is one that is heat-resistant and durable, such as ceramic, porcelain, or natural stone. Ceramic and porcelain tiles are popular choices due to their affordability and wide range of styles. Natural stone tiles, like slate or travertine, offer a more rustic and elegant look but may come at a higher price point. It’s essential to choose tiles that can withstand the high temperatures generated by the fireplace without cracking or discoloring.
How do I ensure the tiles adhere properly to the fireplace surface?
Proper adhesion starts with thorough surface preparation. First, clean the fireplace surface to remove any dirt, soot, or old adhesive. Repair any cracks or uneven areas with patching compound and ensure the surface is level. When applying tile adhesive, use a notched trowel to spread it evenly and create grooves that help the tiles bond securely. Work in small sections to prevent the adhesive from drying out before placing the tiles. Following these steps will ensure that your tiles adhere properly and remain in place over time.
Can I use peel-and-stick tiles for a fireplace makeover?
While peel-and-stick tiles are convenient and easy to apply, they are generally not recommended for use on fireplaces. These tiles may not be able to withstand the high temperatures generated by the fireplace and could peel off or become damaged over time. For a more durable and long-lasting solution, it’s better to use traditional ceramic, porcelain, or natural stone tiles that are specifically rated for use in high-heat areas.
How do I choose the right grout color for my fireplace tiles?
Choosing the right grout color depends on the look you want to achieve. If you want the tiles to stand out, opt for a contrasting grout color. For example, white grout with dark tiles creates a striking effect. If you prefer a seamless, cohesive look, choose a grout color that matches or closely resembles the color of your tiles. Keep in mind that lighter grout colors can show dirt and stains more easily, while darker grout colors are more forgiving in high-traffic areas.
How long does a fireplace tile makeover take?
The timeline for a fireplace tile makeover can vary depending on the complexity of the project and the drying times required for adhesive and grout. On average, the entire process can take anywhere from 3 to 7 days. This includes time for surface preparation, laying the tiles, allowing the adhesive to set, grouting, and sealing. Rushing the process can lead to mistakes, so it’s important to allow sufficient time for each step to ensure a high-quality finish.
Do I need to seal the tiles and grout after installation?
Yes, sealing both the tiles and grout after installation is crucial to protect them from stains, moisture, and heat damage. A good sealer will penetrate the grout and tile, creating a protective barrier that enhances durability and longevity. Make sure to choose a sealer that is specifically designed for use in fireplaces or high-heat areas. Regularly reapplying the sealer every few years will help maintain the appearance and integrity of your fireplace tiles.

Related Posts: